Who is this article for?
🗣️ All researchers (both admins and users)
⭐ Available with all Research Hub plans
Add participants to your project
The first step is to start adding participants to your project. You can choose to upload from Hub, from a csv file, or share a project link where anyone can apply to your study. Click on the “Add participants” button in the upper right hand corner. Then choose your participant source and follow the prompts to bring participants into your project.
💡 Note: Teammate roles cannot invite participants to projects, including adding participants to “Not yet invited” tab—learn more about roles and permissions for your team.
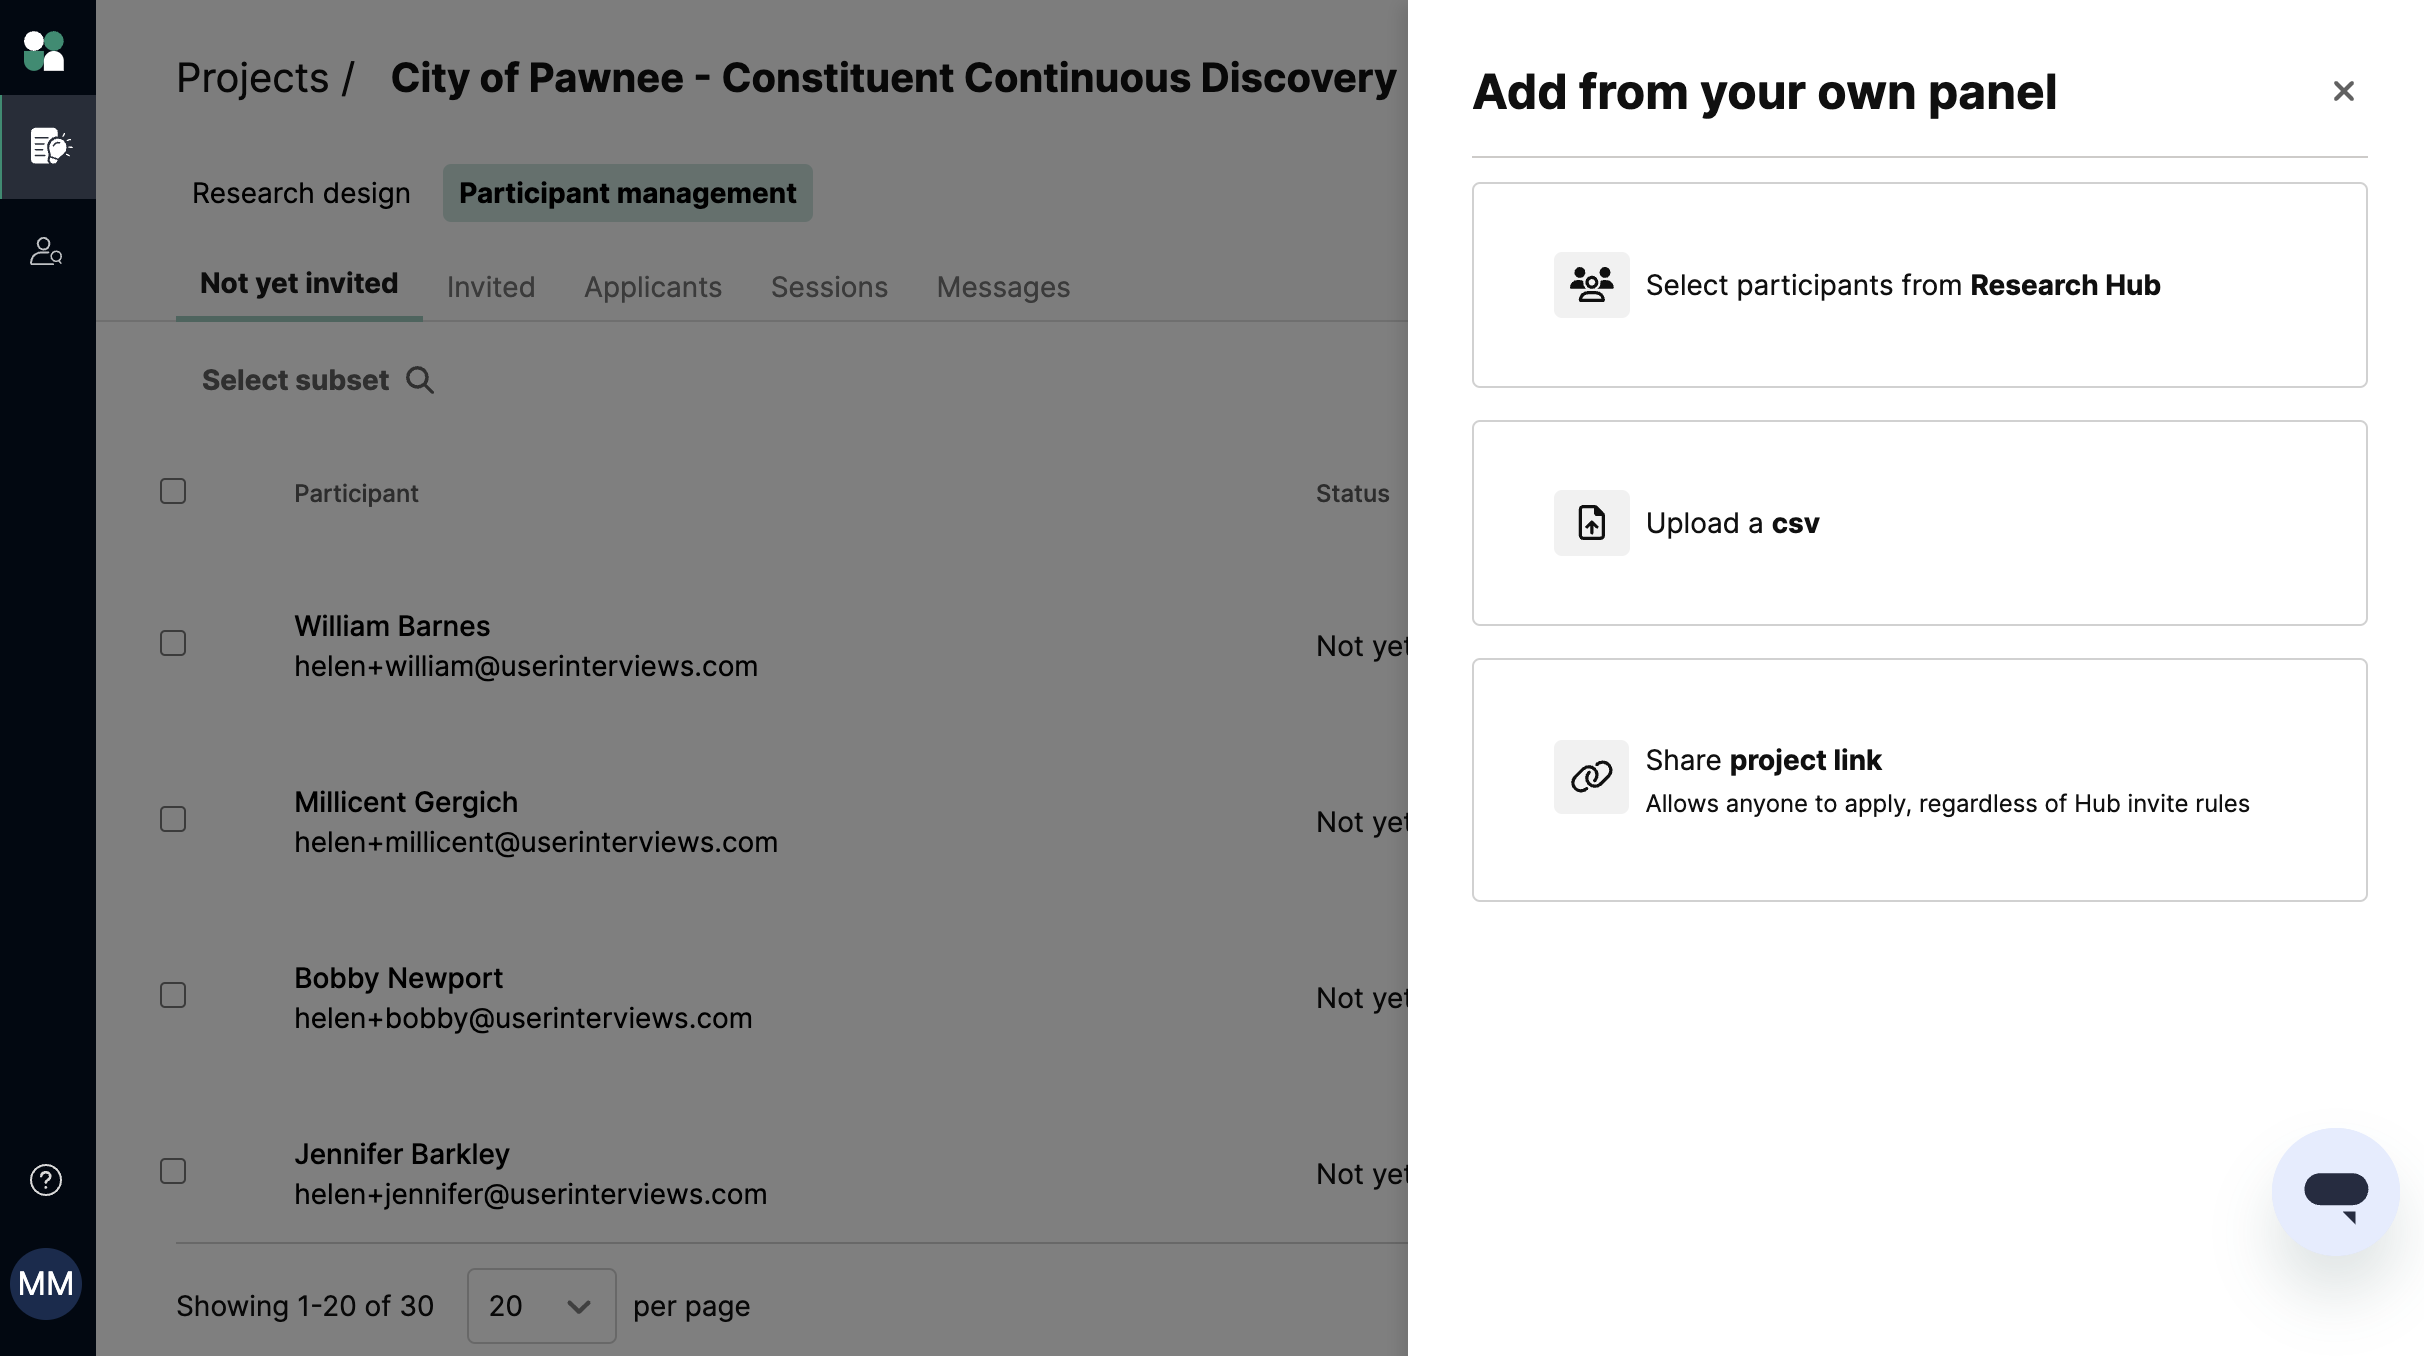
Added participants will appear in the “Not yet invited” tab of the “Participant management” section. Note: At this step, you’re simply adding participants to the project—this will not send them invitations to your study.
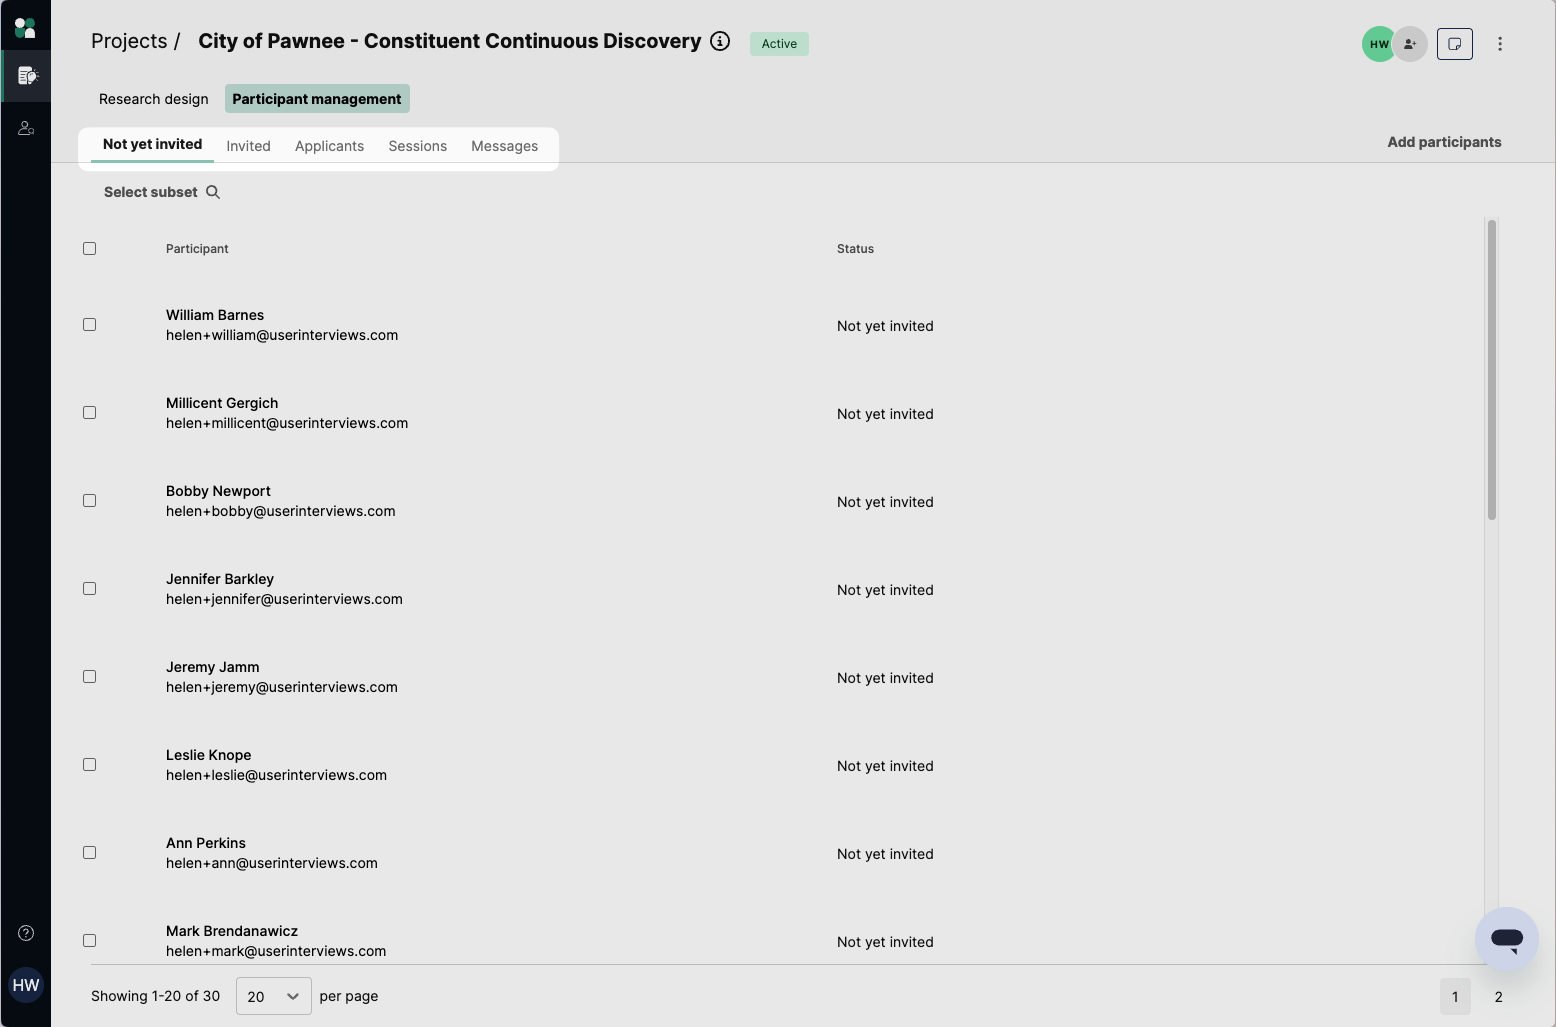
Invite participants to your project
Once you’ve added your participant list to your Hub project, you can choose to:
- Launch your project and invite participants at the same time—this is a good option if your project and participant list are ready to go, and you’d like to optimize for speed.
- Launch your project first and invite participants at a later time—this is a good option if you’d like to finalize project details first, and work on coordinating invitations separately at a later time, or with your team.
To invite participants, check the boxes next to the people you wish to invite.
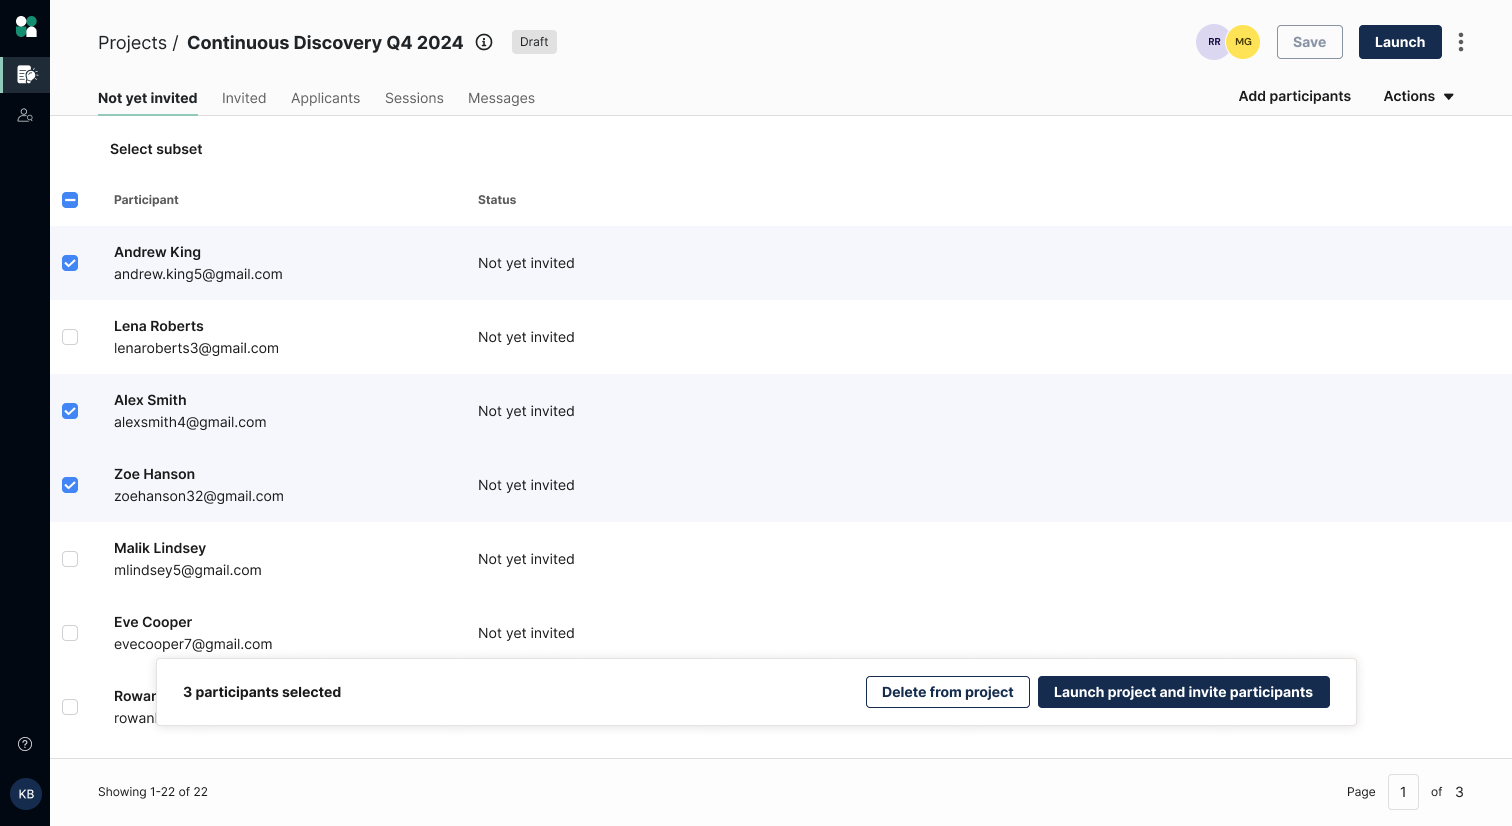
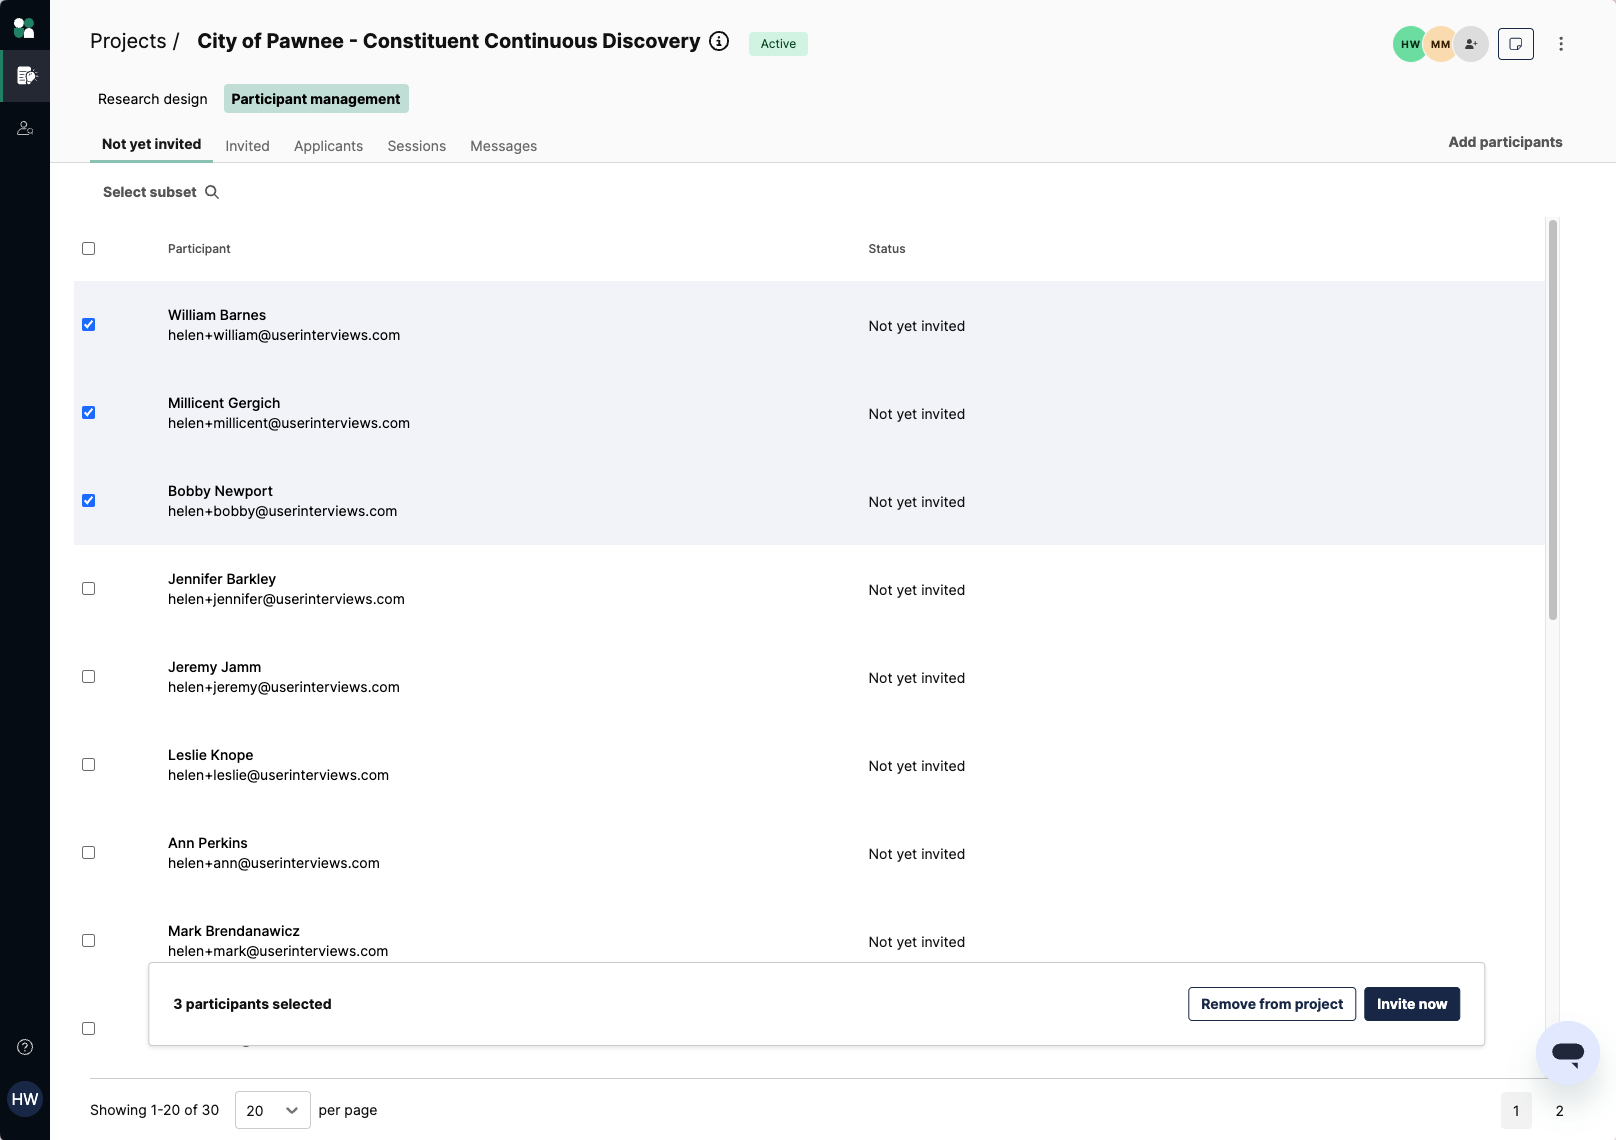
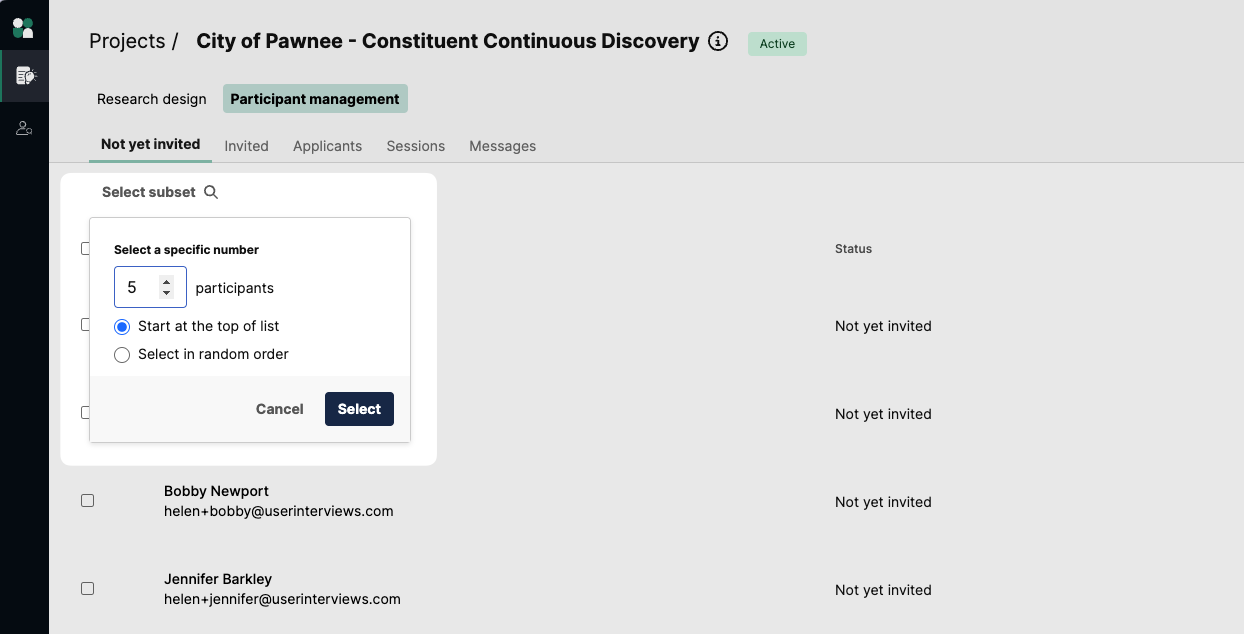
You can also select just a subset of participants to invite—simply specify the number of participants, and if you’d like invitation selection to start at the top of the list or in random order.
Once you’ve selected who to invite, the invitation drawer will open. This is where you set up your invitation email, which is pre-populated with a project invite template. You can edit the template to customize the invite text however you’d like. When you click send, your participants will be invited 🎉

You’ll then be redirected to the “Invited” tab, where you can view and manage your list of invited participants.

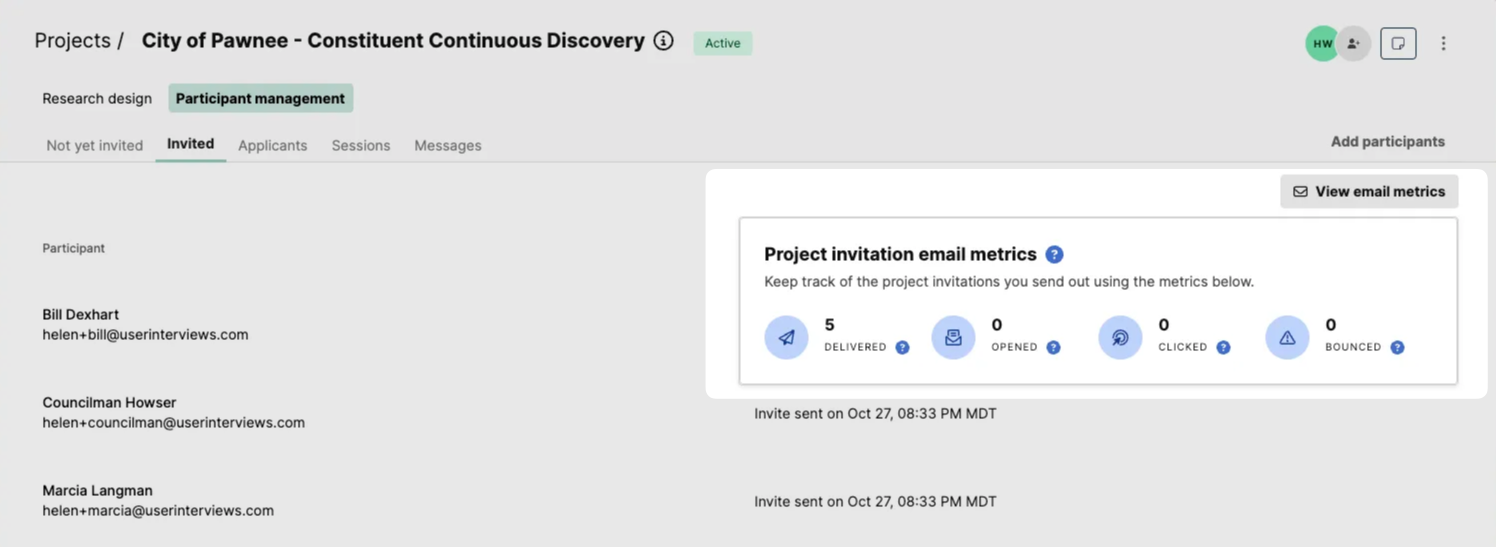
As your project invitation emails go out, you can view key metrics by clicking on the “View email metrics” button in the upper right corner (deliveries, opens, clicks, and bounces).
If you realize you need to add more participants, click the “Add participants” button to add more participants to your project—you can repeat this step as many times as you need. These participants will again appear in the “Not yet invited” tab.
How can I re-invite someone to a project?
Invitees who have not yet applied will automatically receive a reminder email 48 hours after the initial invitation—no manual action required!
FAQ
Who has permissions to add and invite participants to a project?
Team Admin and Researcher roles can add participants to the project (“Not yet invited” tab), as well as send invitations to participants. Teammate roles cannot add or invite participants to projects—learn more about roles and permissions for your team.
For organizations using multiple teams, only members of your own team will be able to add and invite participants. Members of a different team will only have view permissions.
Where can I view project invitation email tracking and metrics?
Navigate to the “Invited” tab of your Participant management section of the workspace, and click on the “View email metrics” button in the upper right corner of the participant table.
How do I remove participants from my project?
You can remove participants from the “Not yet invited” tab of your Participant management section of the workspace. Select the participants you want to remove, then click “Remove from project.”
Can I launch my project first, and invite participants at a later time?
Yes, this is a good option if you’d like to finalize project details first, and work through coordinating which participants to invite separately.


