Who is this article for?
🗣️ Researchers with admin permissions
⭐ Available on Research Hub paid plans
As an admin, you want to be confident that all the researchers on your team are sending professional and on-brand communication to your panel. After all, these are living, breathing, paying customers you’re talking to so the stakes are high!
As research teams scale and study volume grows, we often hear from admins that they no longer have time to provide manual training and oversight for all the research happening across their organization.
Good news: we’ve rolled out new default settings that allow admins to provide communication guardrails for the whole research team.
⚙️ Admins will be able to configure defaults for:
1. Email themes: set branding defaults for all participant emails
2. Email templates: preset templates to auto-populate based on study type and format
3. Sender profiles: regulate how sender profiles may be used
4. Confirmation page: edit the default post-apply confirmation page
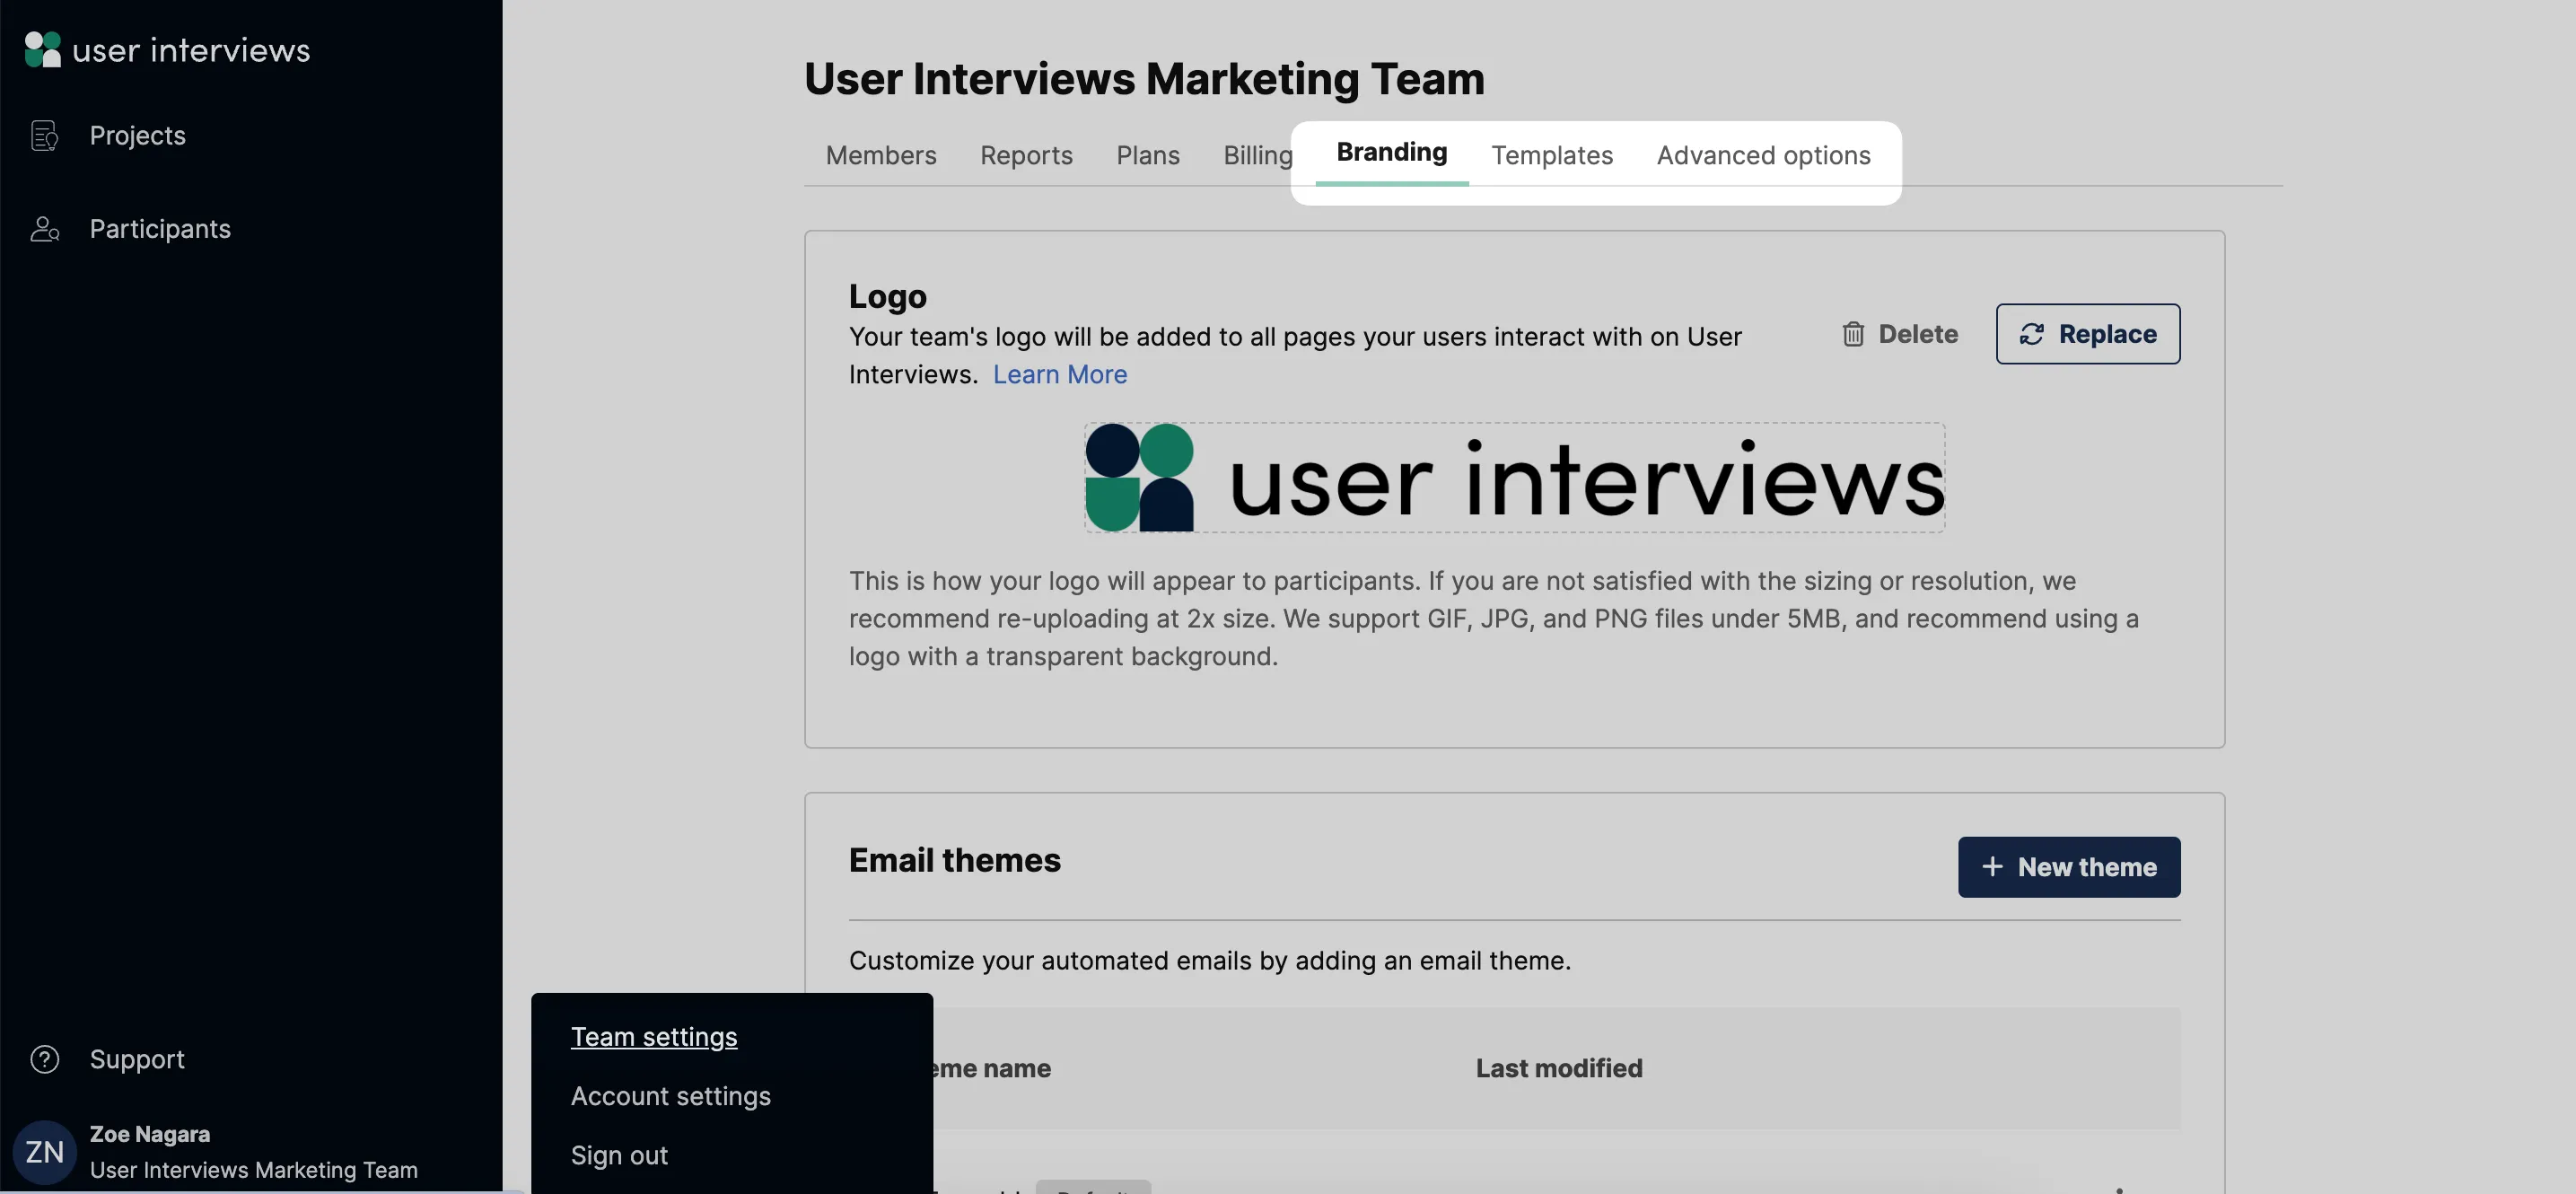
👉 To get started: Visit the Team Settings page and click on the Branding, Templates, and Advanced options tabs

Note: While admins can create a default email theme, template, and sender profile to guide teams toward the best and safest options, researchers are still able to select alternatives if they need to.
💡 Learn about the differences between admin and researcher roles, and how to assign users to roles in our team roles support guide.
Set a default email theme
Email themes—available on our essential, premium, and enterprise Hub subscriptions—are used to style your emails. You can upload your company logo, and use our HTML & CSS editor to adjust fonts, colors, button stylings, margins and more, to match your brand. Learn more in our email themes support guide.
Teams often create multiple email themes for different sub-brands, products, customer segments, or other use cases. As an admin, you can now set a default theme for all new Hub projects—for example the theme representing your parent brand—to guide researchers towards the best and safest option.
👉 Get started from the “Branding” tab on the "Team settings" page. Click on the ellipsis icon alongside the email theme you want, and select “set as default”.

Set up default email templates
Email templates are used to create and manage content for all the automated emails sent to participants throughout the course of a study. Custom email templates are available on our essential, premium, and enterprise Hub subscriptions. Teams will often create template sets that correspond with all the combinations of study type (e.g. 1-1 interview) and format (e.g. online) that their team commonly runs, then reuse these templates for future studies of that same type and format. Learn more in our email templates support guide.
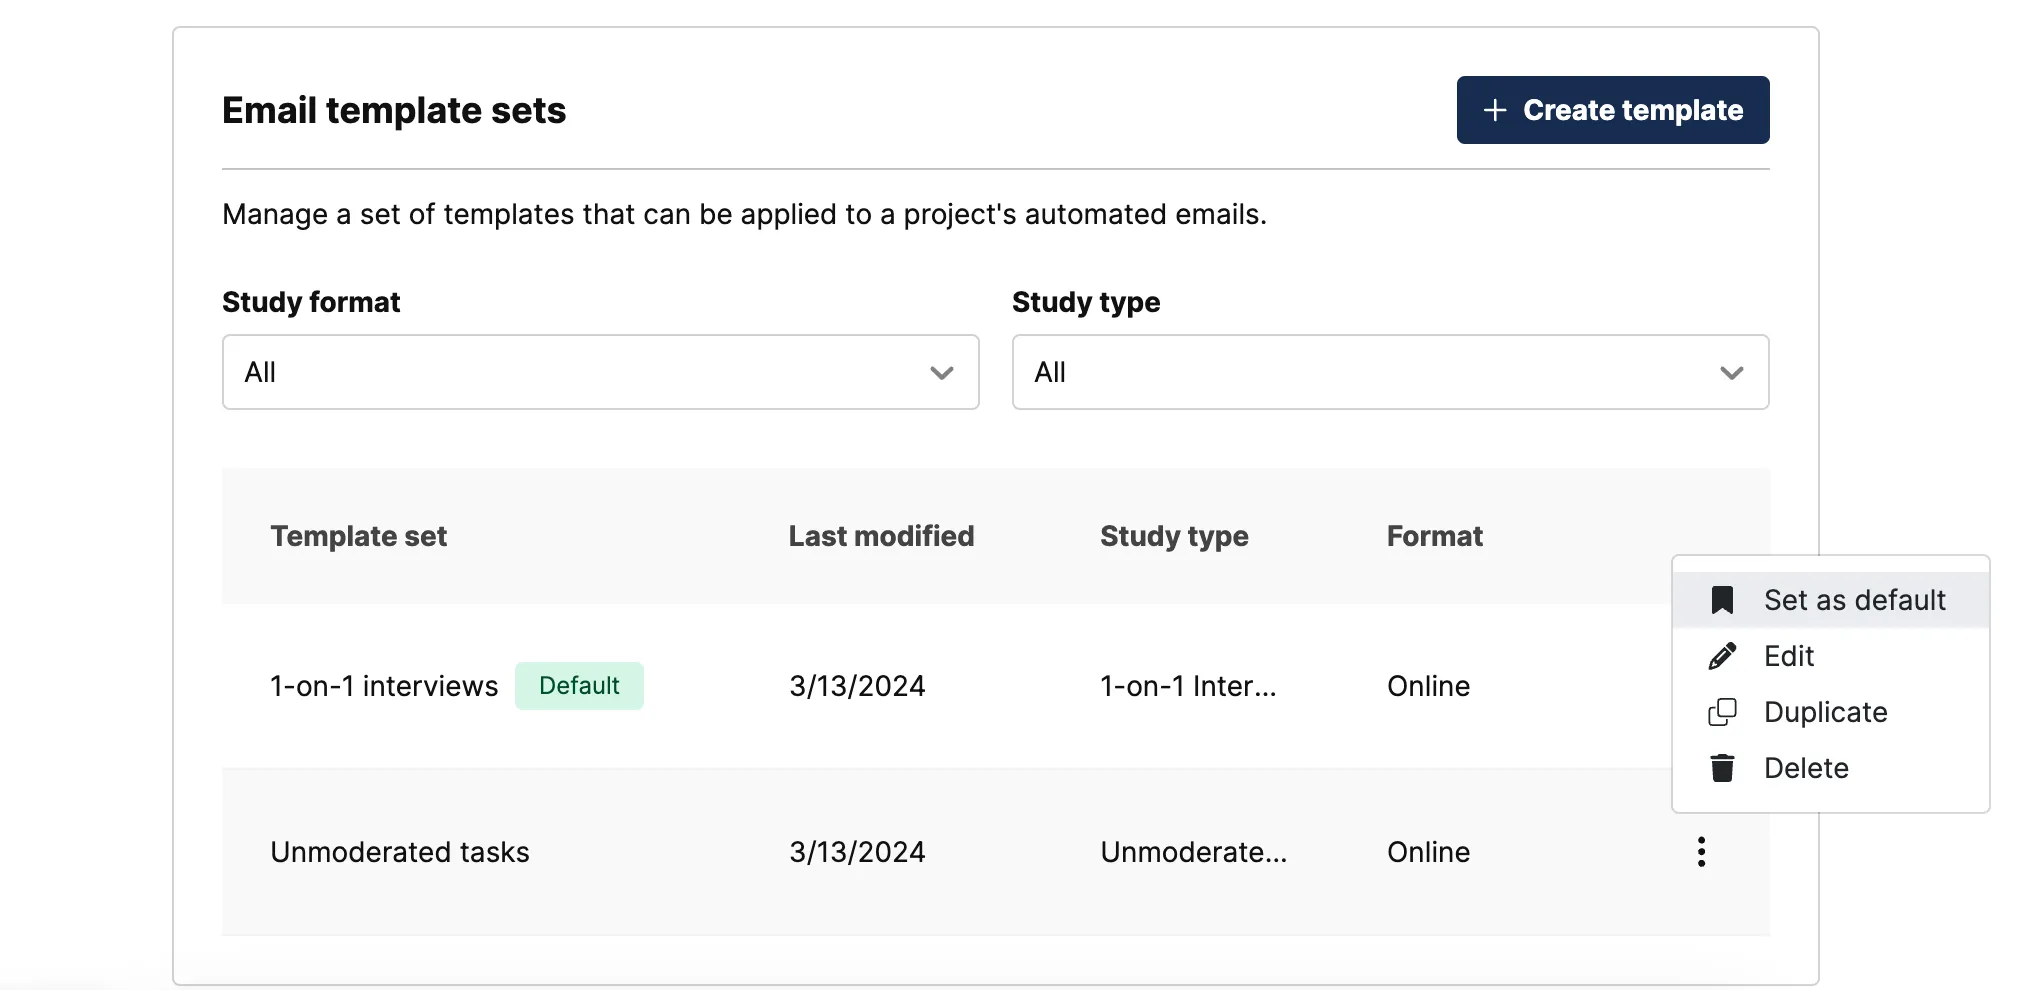
As an admin, you can now specify the default templates you want your team to use for each combination of study type and format. Once set, default templates will auto-populate in the project builder whenever a researcher on your team launches a study of that type and format.
Note: Your team can have multiple defaults if you run studies of differing types and format. In the example below, we have a default set for 1-1 interviews, and are creating another default set for unmoderated tasks.
👉 Get started from the “Templates” tab on the “Team settings” page. Click on the ellipsis icon next to any template set and select “Set as Default”.

Regulate how sender profiles are used
Participants are more likely to trust and respond to emails from those they recognize. Sender profiles give you control over the “from” address that all the automated emails for a Hub project are sent from. Learn more in our sender profiles support guide.
Note that using sender profiles requires you to first authenticate your domain, a feature that is available on both Hub premium and enterprise subscriptions.
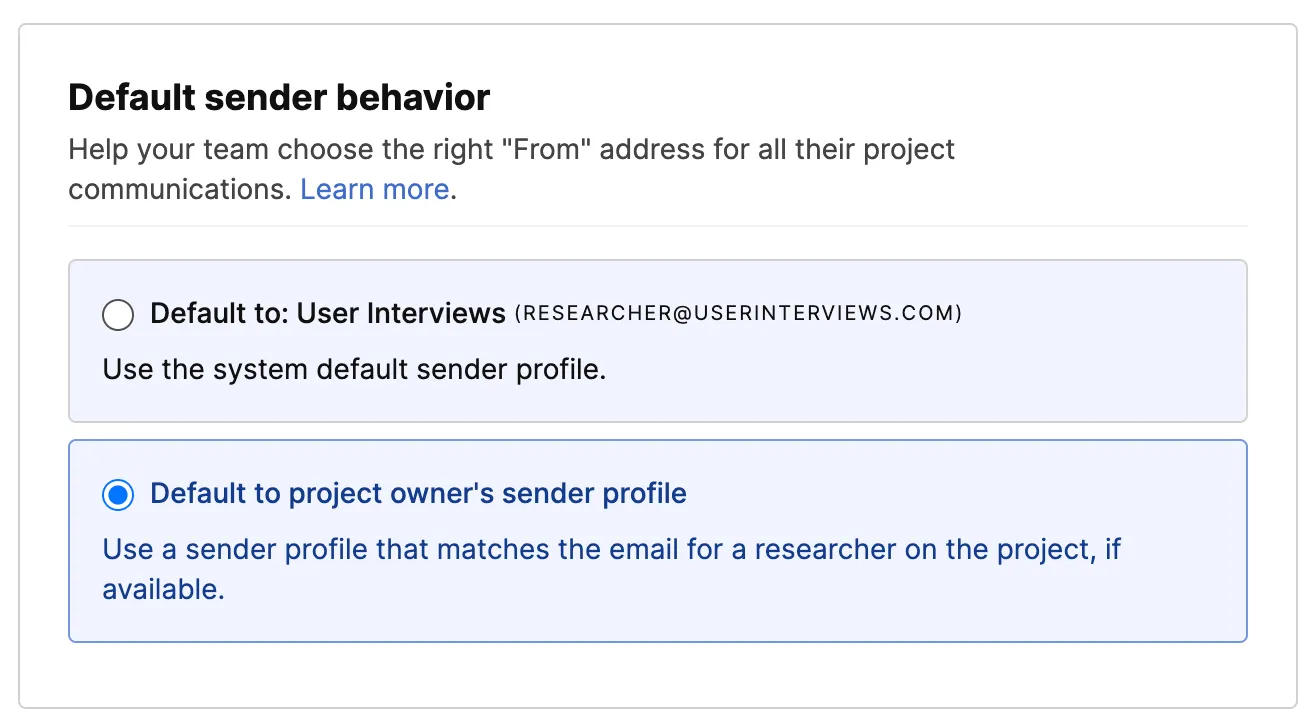
As an admin, you can now set a default sender profile for your research team. You have two options:
- Option 1: Set the default sender profile to research@userinterviews.com
- Option 2: Set the default sender profile to match a researcher on the project
If you choose the second option, the sender profile field on new Hub projects will be pre-populated with the project owner’s sender profile, if available. If it’s not available, the system will search for a sender profile of any project collaborator and apply it as a back up. We’ll also group together all project owner and collaborators’ sender profiles within the dropdown, so they can easily be found and applied to the project. If no researchers on the project have a sender profile, the field will be left blank by default, and a researcher will need to manually select an option before launching the project.
👉 Get started from the “Advanced options” tab on the "Team settings” page.

Customize the default confirmation page
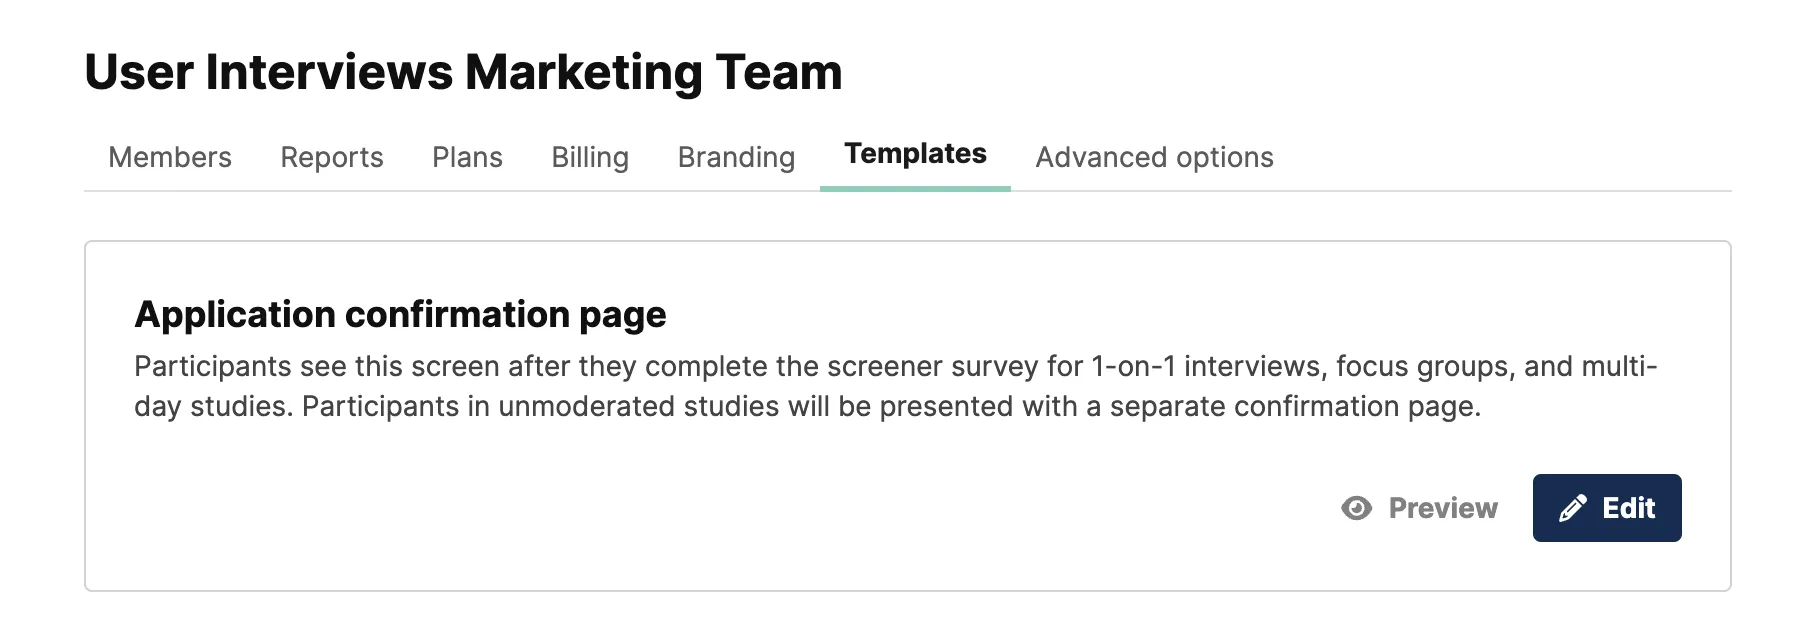
As an admin, you can now edit the default confirmation page that participants see after applying to a study. Customize the page header and body copy, apply text formatting with a simple WYSIWYG editor, and preview changes. Updates that admins make to this page will be applied to all projects launched by their team.
👉 Get started from the “Templates” tab of the "Team settings” page.

Benefits of setting up defaults and customizations for your team
- Set communication guardrails for all Hub research projects, org-wide
- Maintain brand consistency and build trust with your panel of customers
- Free up time you and your research ops team spend on platform training and manual oversight
- Free up time researchers may have spent searching for the most relevant theme or template to use
💡 Again, remember that while admins can create a default email theme, template, and sender profile, these selections are not “locked”, researchers are still able to select alternatives for their own projects if they need to.


